Defining a Group Merge
In merge only within specified groups mode, you import a file that specifies the Sections to merge together. Or use an existing Layer to merge.
The grouping file should contain one item for every Section to merge, and a field to be used as a Group ID. The grouping file can contain explicit Section references. Or Section references can be determined automatically during import, based on file item proximity to the Section. You can name the Group ID field as you choose. It can be numeric or text.
Network Sections for items with the same Group ID are merged into single Super-sections according to the Group Merge connection rules.
Network Sections that are not associated with any items from the grouping file are not merged. A disassociated Section presents as a single Super-section in the resulting Section Merge Layer.
In Group Merge mode, two nearby Sections are considered for merging if they meet all of the rules described in the following table.
Merge Only Within Specified Groups Connection Rules
- Their associated grouping file items have the same Group ID value
- The closest ends of the two Sections are within a certain maximum distance (which you can define)
- The angle of deviation between the two Sections at the join is below a certain maximum angle in degrees (which you can define)
- Optional—The Sections being joined run in the same direction. That is, they are joined start-to-end or end-to-start (which you can define)
In some cases, more than one Section can be considered for joining to the end of another. For example, if a Section ends where two others fork off. In such a case, the two closest Sections with the smallest angle of deviation at the join are merged.
Sections are merged together following these rules until the longest possible Super-section is generated. This is given a unique Super-section ID and is used as input for Analysis. A Treatment can be generated anywhere along a Super-section.
In some circumstances, not all of the Sections that are identified by the Group ID in the group file can be merged into a single Super-section. For example:
- If there is a mistake in the file
- The merge rules are too slack—a maximum distance may be too big
- Intentionally, as desired by the user
In such cases, the Group Merge generates two or more Super-sections that contain Sections that are associated with the same Group ID. For example, imagine that the grouping Layer that you choose is the Network Layer itself. You want to merge all Sections with the same road number, such as A30 *or *M1. The Group ID is Road Number. Typically in such cases, many Super-sections would be generated for the same Group ID. If the maximum distance is set small (e.g. 3m) and the maximum angle is quite tight (e.g. 20 degrees), you would get two very long Super-sections (one for each direction of the road—east bound and west bound) and a number of smaller Super-sections corresponding to slip road Sections etc.
To set up a Group Merge
-
In the Management module, import your grouping file using Data Import. For more information, see Data Import Overview.
-
Click Section Merge and then Add Section Merge Rules.
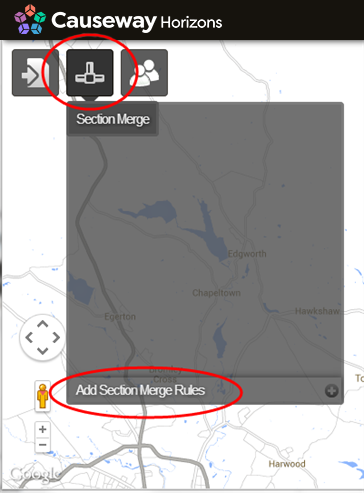
The Section Connection Rules window opens.
-
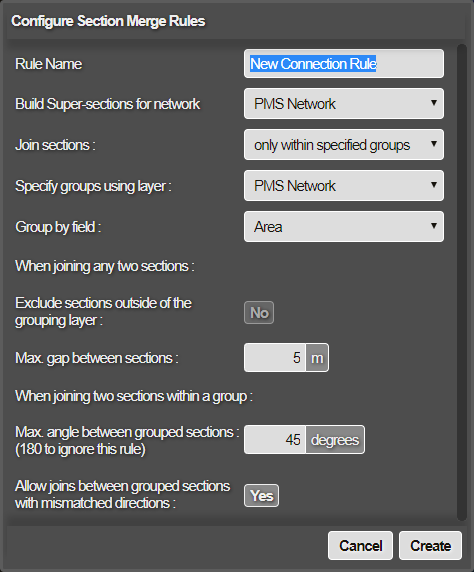
Enter a name for the new Section Merge Layer to generate, specify merge only within specified groups mode, and select the Network that contains the Sections to be merged.
-
Complete the following fields refer to Group merge connection rules above:
Build Supersections for Network
Select the Network you would like to build your merged sections against.
Specify Groups Using Layer Select the Layer generated by your grouping file data import from Step 1.
Group by Field
Select the field name in your grouping file that contains your Group ID. Sections associated with items that have the same Group ID value are considered for merging into a single Super-section.
Exclude sections outside of the grouping layer
To filter the merge results to only include the selected Network, set to Yes . To prevent this, set to No . If set to No, the resulting overlay will display sections outside the Super-section.
Max. Gap Between Sections
Only Sections that have endpoints within this distance of each other are considered for merging. Generally should not set this too large, you can enter a value from 1 to 500m.
Max. Angle Between Grouped Sections
Only Sections that have ends that align within this angle are considered for merging. Set 180 degrees to ignore this rule. Sections are perfectly aligned if the angle at join is 0 degrees. The angle of join is used for selecting the best sections to join in cases of ambiguity.
Allow Joins Between Grouped Sections With Mismatched Directions
To allow Sections to be joined that do not match direction (i.e. end-to-end or start-to-start), set to Yes . To prevent this, set to No. Section direction is not used for selecting the best sections to join in cases of ambiguity.
- Click Create
Horizons generates map tiles for the Layer, which may take a few minutes. The Section Merge Layer is created. You can now view and export the resulting Section Merge Layer, and use it as input to Analysis.
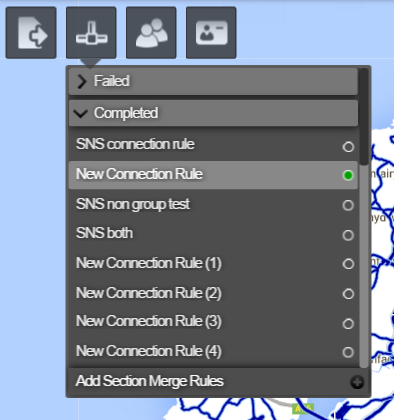
When you have created a Section Merge Layer, its configuration appears in Section Merge Completed folder.