Uploading a Data File
When you have prepared your data file, you can upload it to Horizons.
Once uploaded, you can configure the data import, before the data is committed to Horizons. See Importing and Configuring Data.
IMPORTANT: This system is cleared for data up to Business Impact Level 1 (BIL1) only. Refer to your data policy before uploading data.
To upload a data file
- Open the Management module.
- Click the Data Import icon.
The Data Import drop-down opens. The drop-down displays data that is already imported into Horizons.
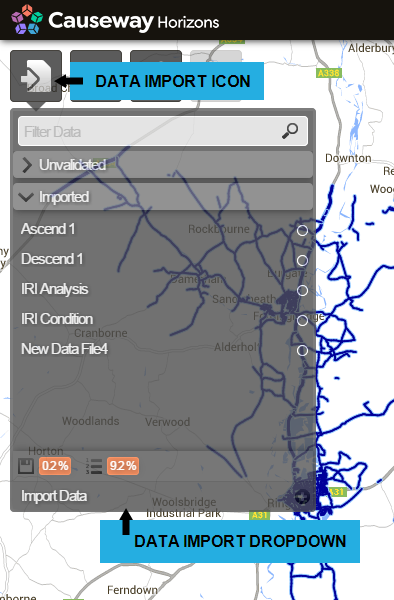
- To import a new dataset into the system, click Import Data at the bottom of the drop-down.
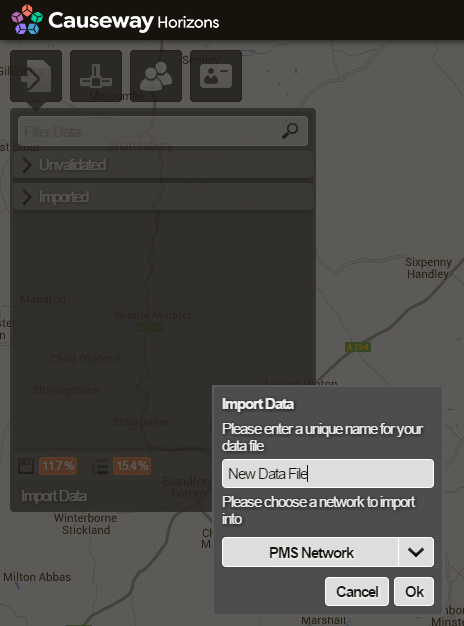
The Data File Name window opens.
- Enter a name for the data file and select the Network to upload this data against.
This name is used as a reference to the file and its associated data import configuration. (See Configuring Data Import Fields.) The name does not have to match that of the file to import.

- Click OK.
The selected data file name is saved in the Data Import drop-down and the Configure Data Import window opens.
- Click Add Files.
The file explorer window opens.
- Select the file to import and click Open.
The file is added to the Upload Files list. The upload may take a short time. If a GIS file is being imported, such as an ESRI SHP, or a MapInfo TAB file, ensure that all associated files are selected for import at the same time. For more information, see Uploading a GIS File. For Comma Separated Value (CSV) files, only the file itself is required although multiple CSV files with the same file structure can be imported at the same time. For more information, see Uploading a CSV File.

- When the files for import are uploaded, click Close. You can now configure the data import. See Importing and Configuring Data.