Creating Bubble Styled Layers
You can use Horizons to create bubble maps for your Layers for added depth and detail. You can create bubble maps for any line or point.
To add bubble styling to a layer:
- Find the desired Layer in the Layers dropdown and click the edit button.
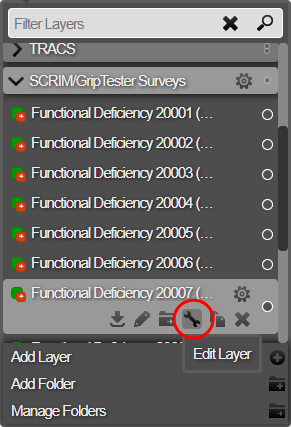
- Select the gear icon at the top of the edit menu to access advanced editing options
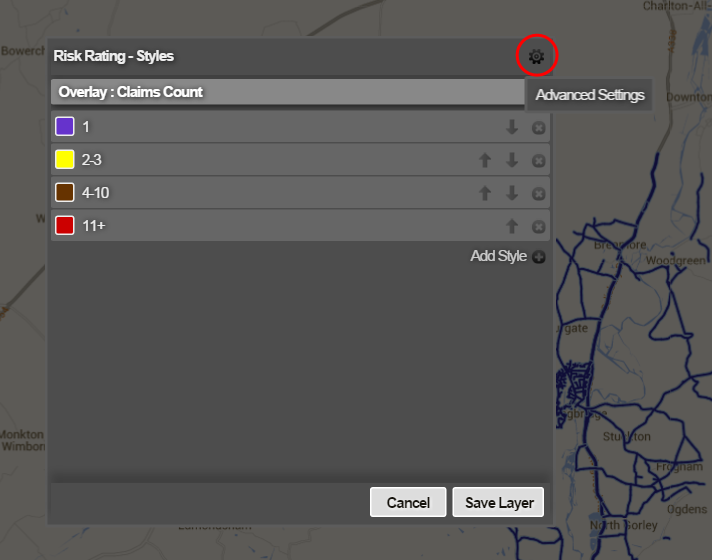
- Click the no button beside the Bubble Map option to add bubble styling to your map.
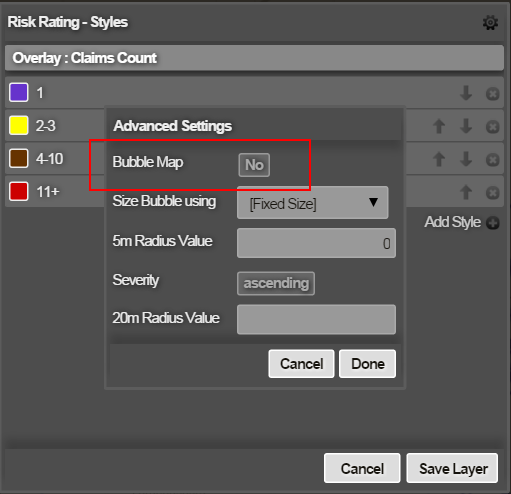
- You can set the field the bubble styling will be sourced from and additional styling options from this view. In “Size Bubble using” you can select “Fixed Size” to display all bubbles at the same size, or you can scale the size of the bubble according to the value of a numeric field.
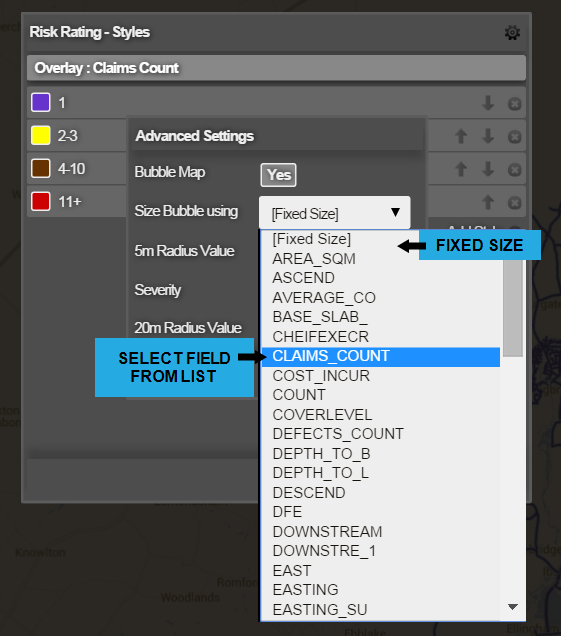
To set the scale factor, enter the value of the field for which the bubble radius will be 5m when viewed zoomed-in in the map. This would normally be a low value, e.g 1, 2 or 3 in the example above, so setting a value of “3” for the 5m radius setting for “CLAIMS_COUNT” means that a “CLAIMS_COUNT” of 3 would generate a 5m bubble while a value of 12 would give a 20m bubble.

If your field represents a value that gets more severe when descending (e.g. road surface texture) then set Severity Descending, and also specify a 20m radius value required to define the scaling in this case.
- Click done in the advanced options menu to return to the Layer editing menu.
- Click save to save the changes to your layer.