Defining a Condition Parameter
All condition data that is held within Horizons can be viewed and accessed from the Parameters drop-down in the Analysis module.
To configure a Condition Parameter
- In the Analysis module, click the Parameters icon.
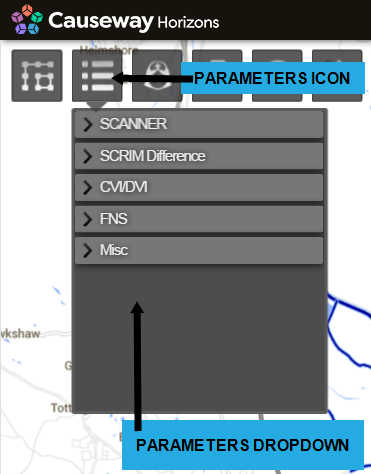
The Parameters drop-down opens. All condition data for your Network is divided by survey type into folders.
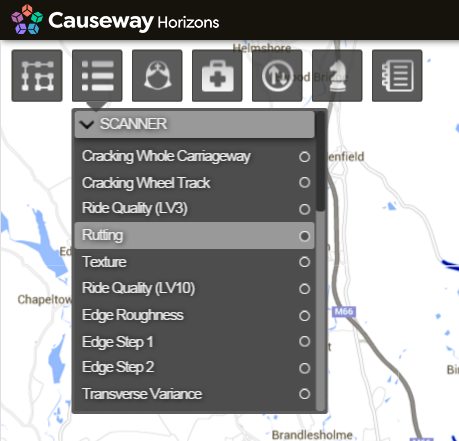
- Click the parameter to view.
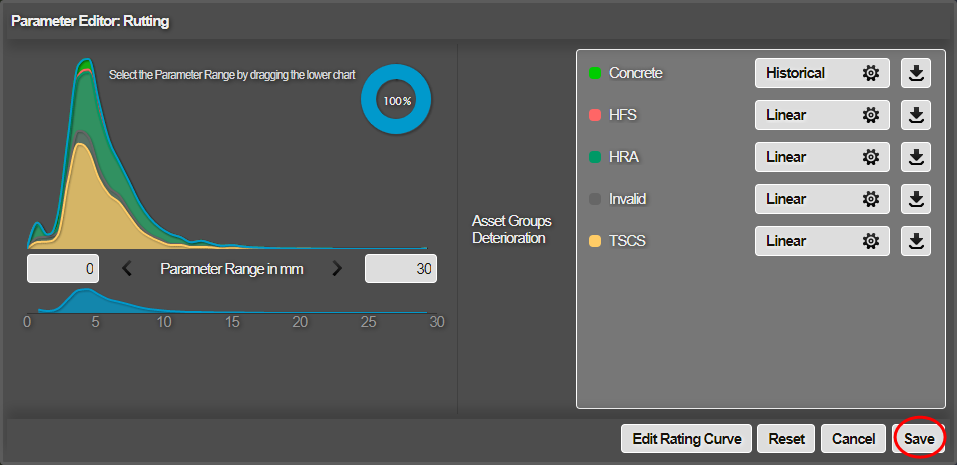
The Parameter Editor window opens.
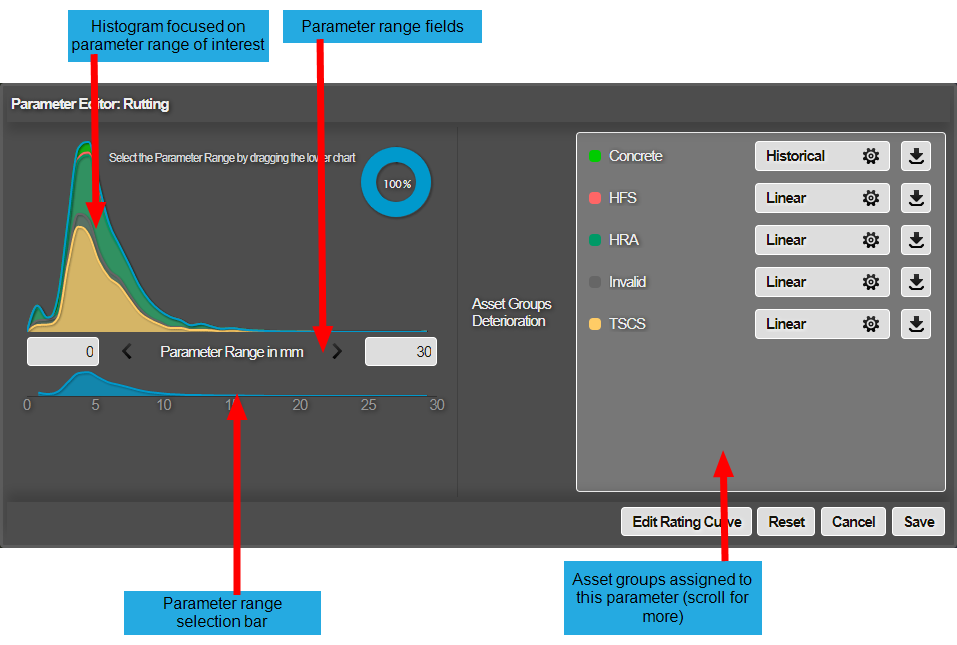
The Parameter Editor shows the range of data for the selected parameter.
In the example above, the parameter range is set between 0 and 30mm for rutting. Any values beyond 30mm are considered to be 30mm by the model. This is seen in the parameter range fields and the parameter range selector bar beneath the top histogram. The Asset Groups that this parameter applies to are listed. Parameter range defaults are provided by the system.
-
You can now use the Parameter Editor to define the range of data to use in your analysis. For example, you may want to remove any extreme values that may skew the range. Edit the parameter range in one of the following ways:
-
Enter new values into the parameter range fields* Left click and drag a new range in the parameter range selector bar
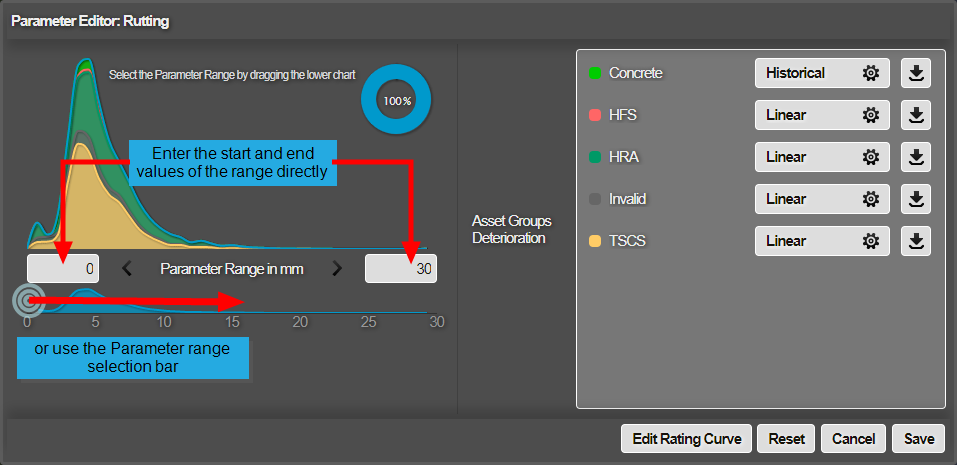
If you make a mistake, click Reset to return to the last saved parameter range.
- After editing the parameter range, you must select Save to recalculate the deterioration curves.
The Parameter Editor closes when you select Save.
- Click to open the parameter when the recalculation is complete. Edit the deterioration curve for an Asset Group as required.
For more information, see Defining a Deterioration Curve.
- Click Save.