Using the Imagery View
Work with fullscreen imagery
If video data exists for your Network, you can open it in the fullscreen Imagery View. This lets you view imagery at full resolution and access more functionality, including the ability to overlay Layer data onto images and measure distances. Survey videos enable you to validate and give context to your survey data.
While the Imagery View doesn't include the same video player controls as the thumbnail view, it's possible to use keyboard shortcuts to navigate through the video frames.
The projection of assets and measurement functionality is currently only available with calibrated Yotta Asset Survey or Yotta SCANNER video data.
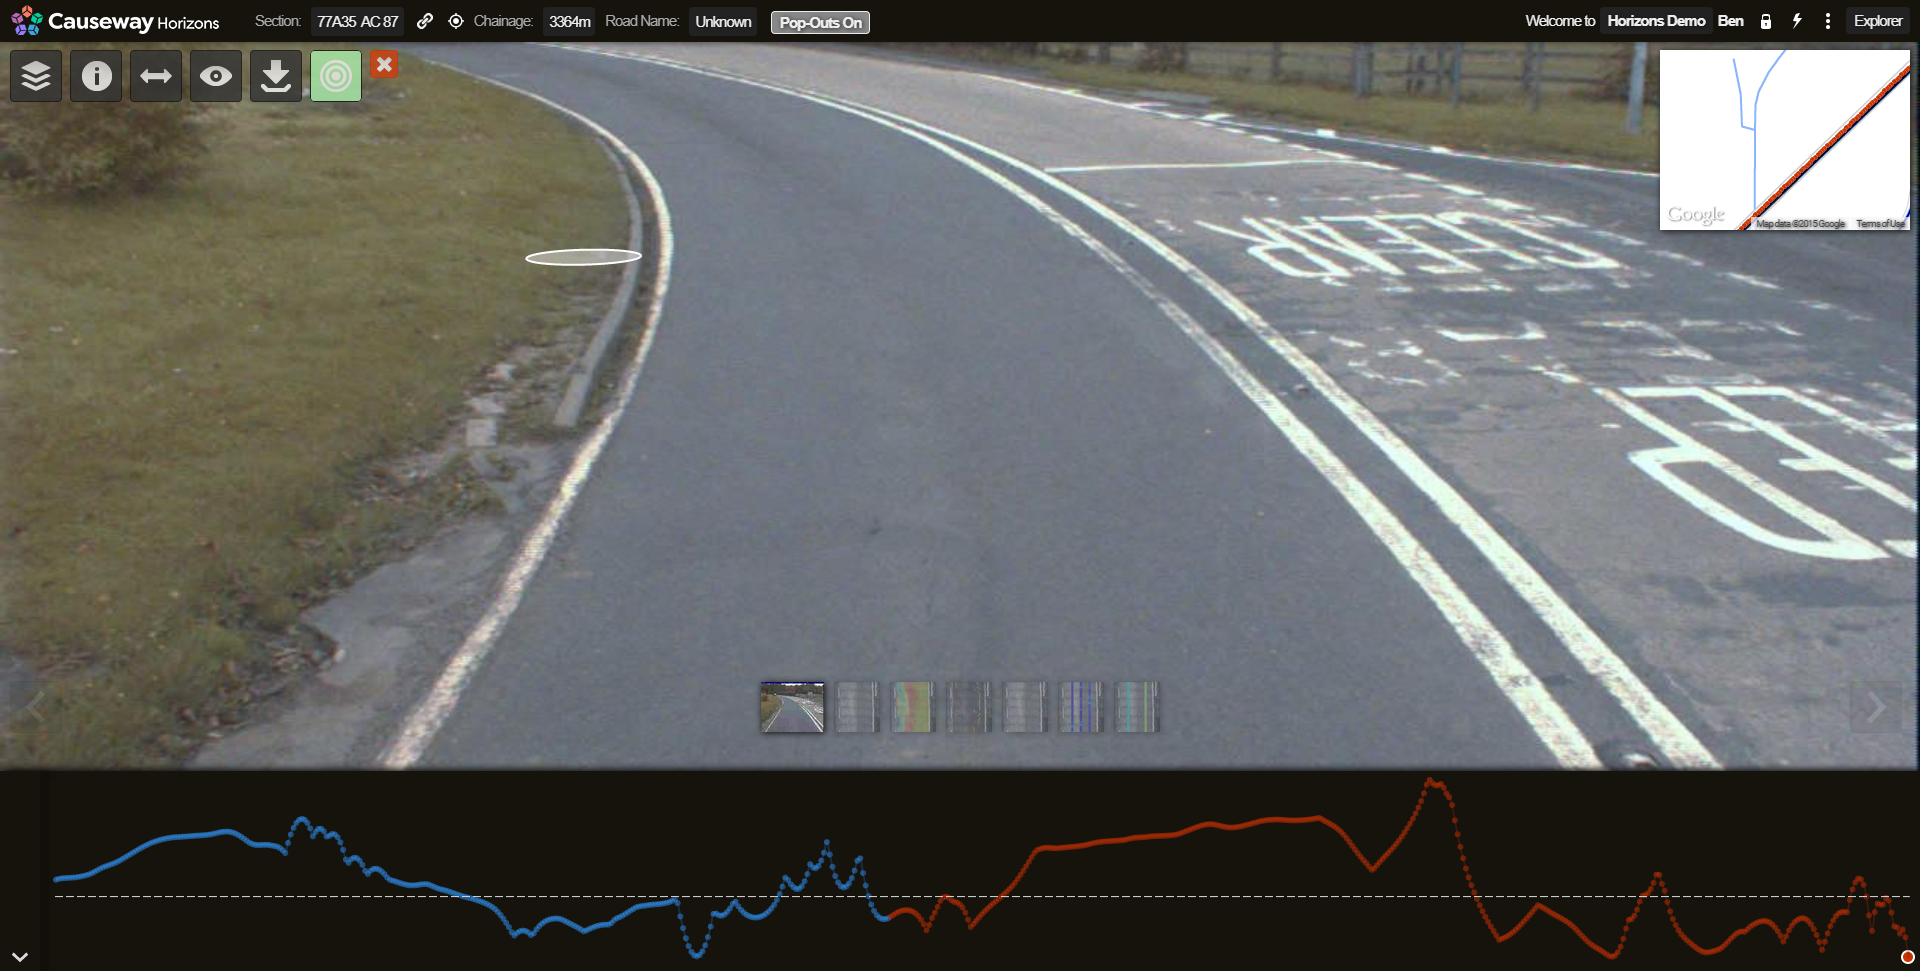
SCANNER Surfaces
The Imagery View also lets you can also view high resolution, downward-facing SCANNER images of the road surface. The opacity of SCANNER images is adjustable where data permits, allowing for close inspection of road conditions through images. Adjusting the opacity is especially helpful when examining Transverse Profile data, as a more transparent view may let you visually map defects to the pavement surface.
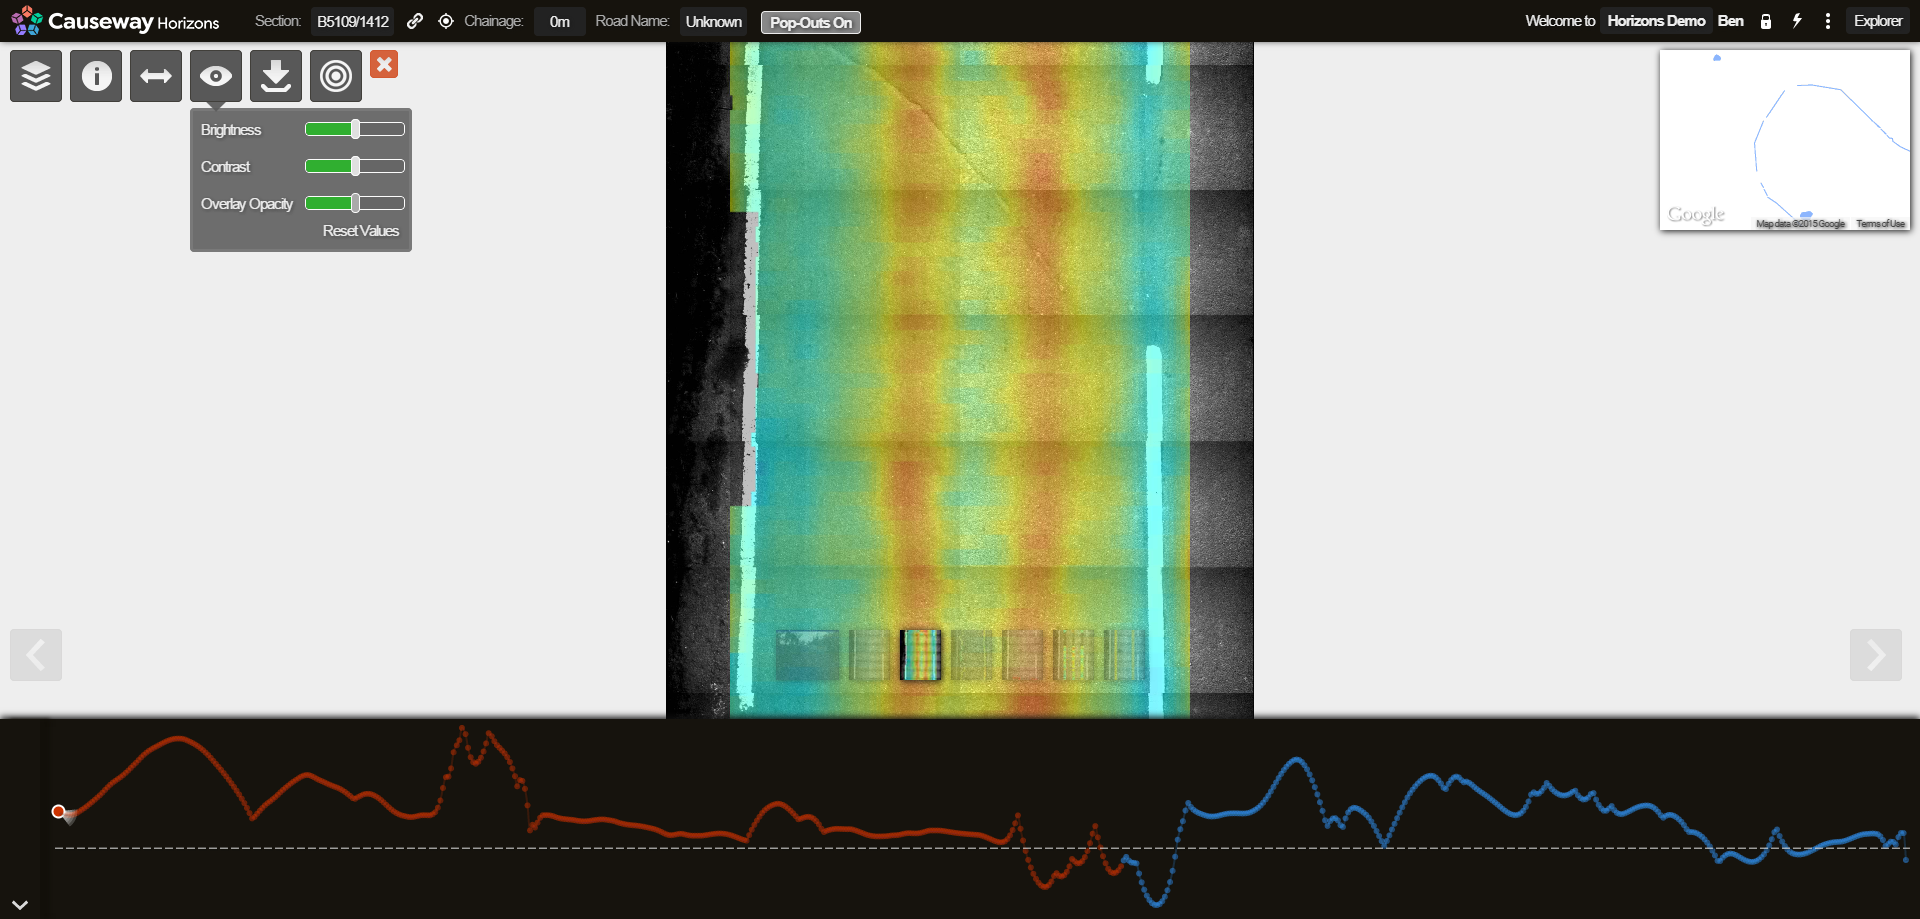
In the example below, RAG bubble mapping and RCI parameter mapping indicate that part of the road is in poor condition, due to issues with cracking, texture and profile variance. Data item pop-outs help to indicate the status of individual segments of this Section. By selecting the associated SCANNER Imagery data and opening the downward-facing images in the Imagery View, you can validate the survey data.
Open the Imagery View
To view imagery for a Section:
-
Select the Section you want to examine.
-
Select the top Imaging icon to list the available video data sources. If none are available, the icon will be dimmed out and unusable. You can hover over a video source to see information about it. Select one to continue.
-
The thumbnail of the first video frame will appear in the top-right corner. Hover over it and select the central icon:

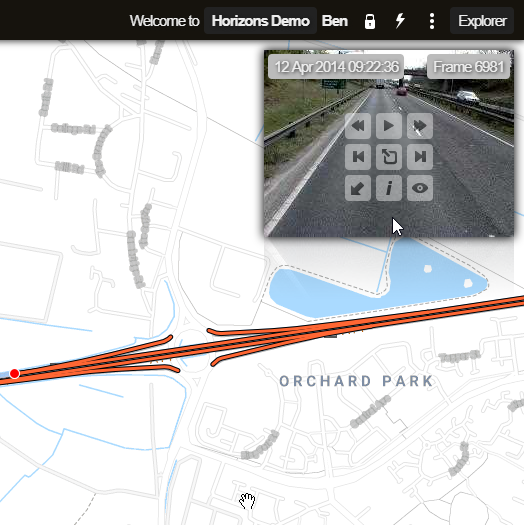
The Imagery View loads. The Section number and chainage location are shown at the top of the screen.
Switch cameras
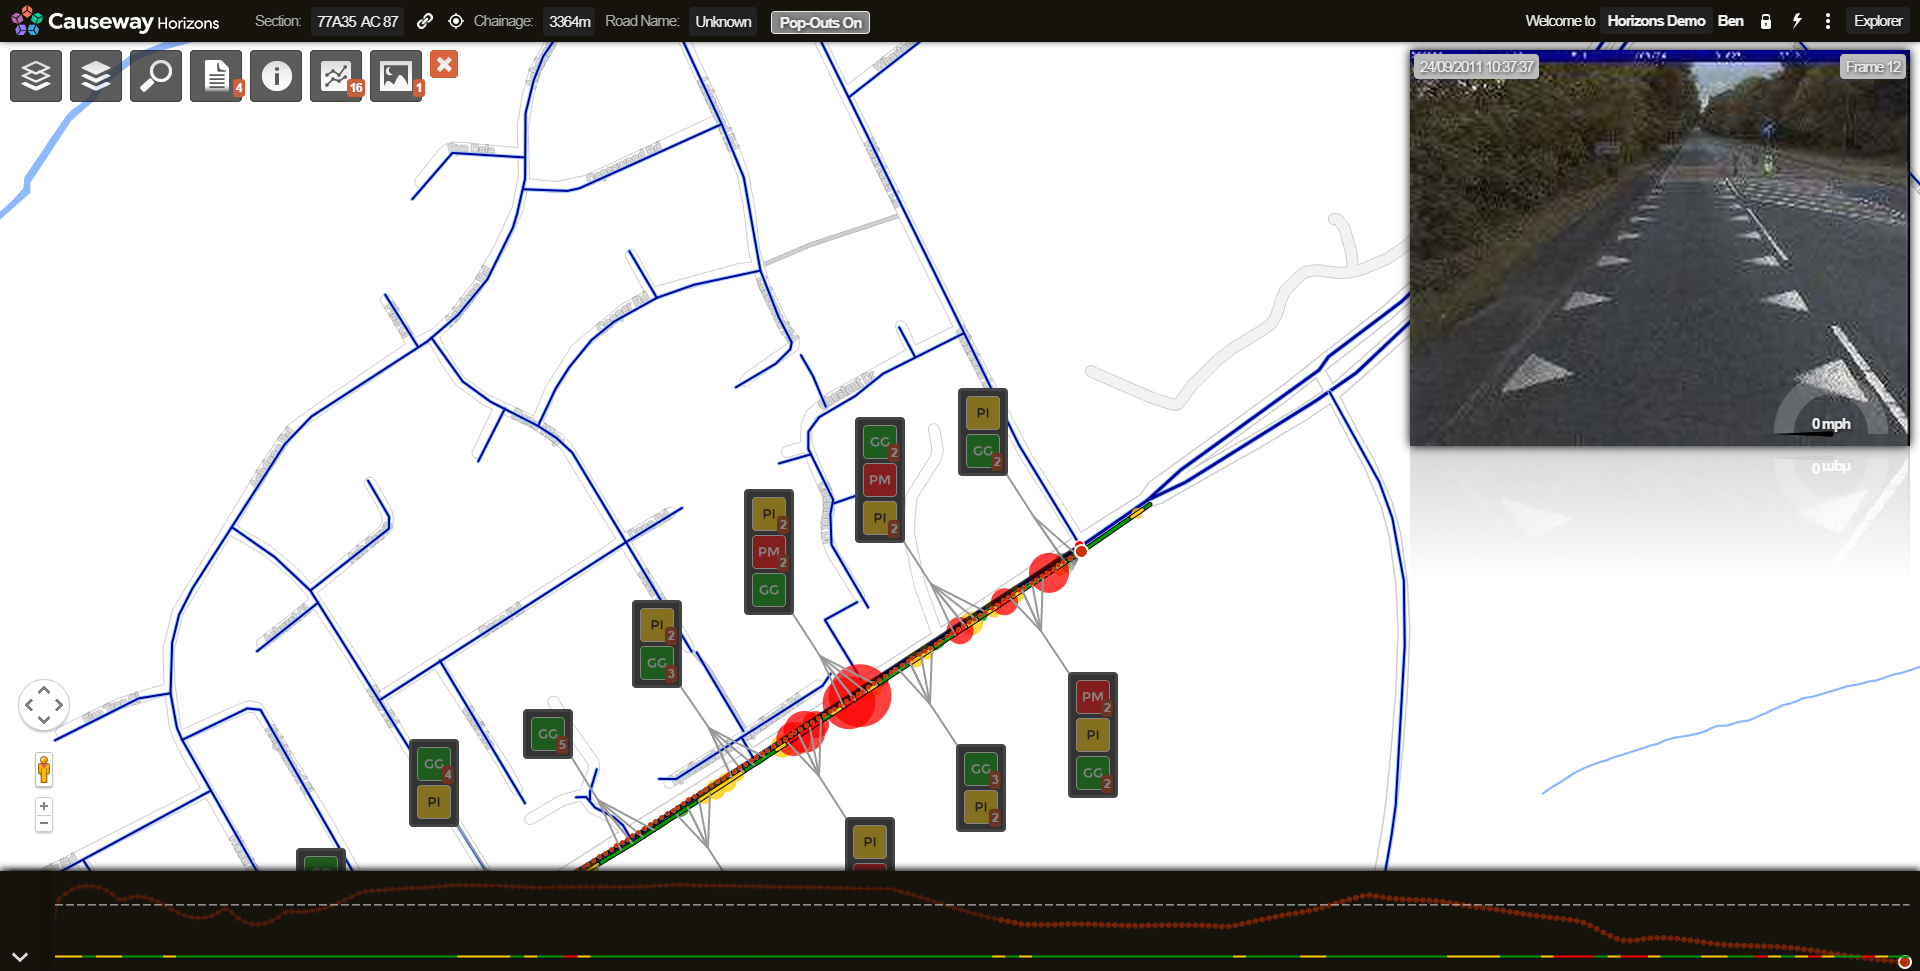
To switch to a different camera view, select one from the thumbnail images displayed along the bottom of the main image. Alternatively, you can scroll through the camera views using the left and right arrow icons to the side of the main image.
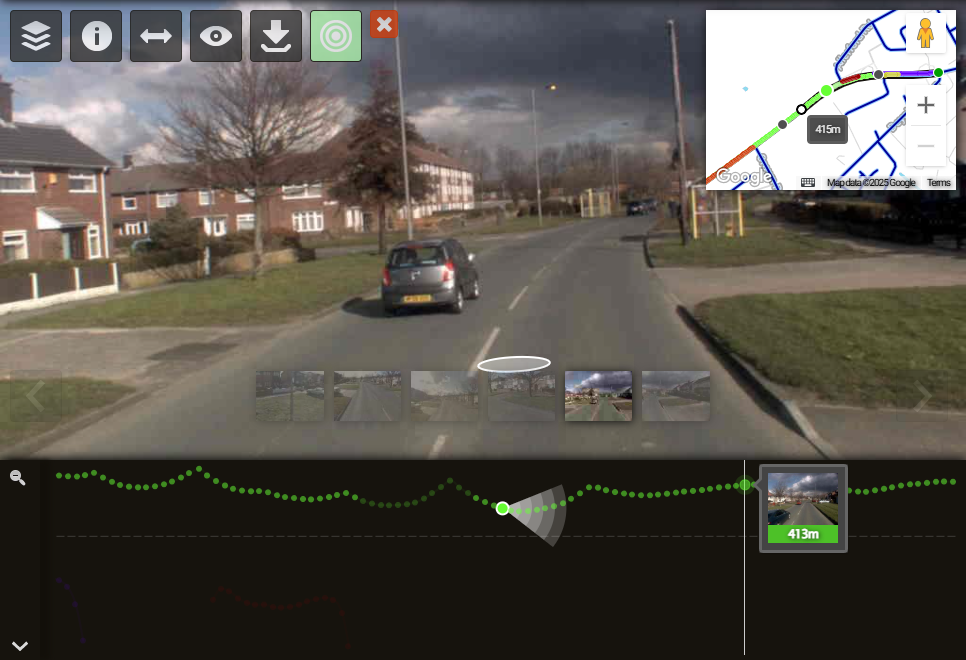
Navigation
To select a location along the Section, select a point along the bottom Strip View. The imagery associated with that location will be loaded.
To go forwards, select a forward camera from the bottom thumbnails (or use the left/right arrow icons to scroll through them). Move the oval cursor to the required forward position and select. Alternatively, you can use the Right Arrow key on your keyboard to jump ahead a single frame, or press Shift + Right Arrow to jump ahead ten frames.
To go backwards, select a backward camera from the bottom thumbnails (or use the left/right arrow icons to scroll through them). Move the oval cursor to the required backward position and select. Alternatively, you can use the Left Arrow key on your keyboard to jump back a single frame, or press Shift + Left Arrow to jump back ten frames.
To jump to the best view of a selected data item, turn on the Snap Camera to Item icon at the top.
Imaging controls
The following controls are available at the top of the displayed imagery.
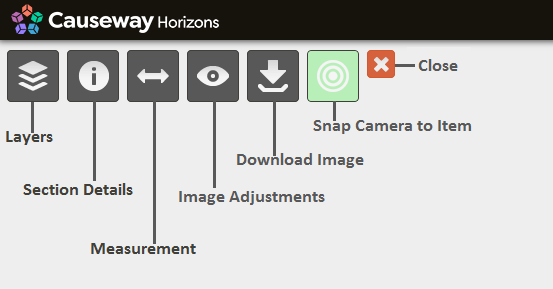
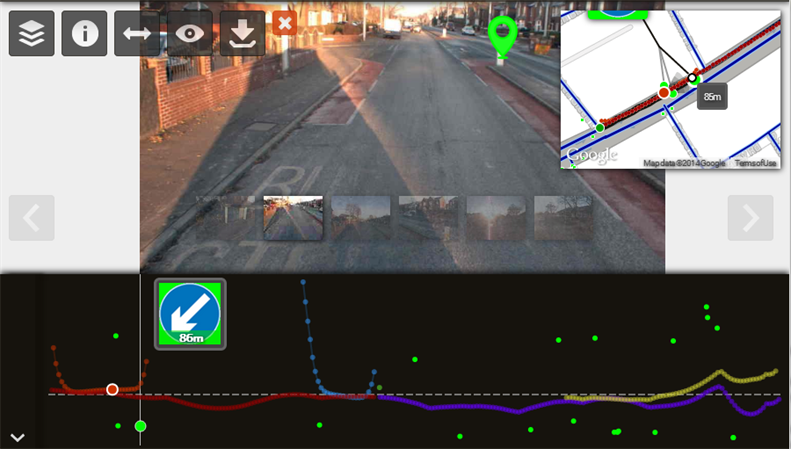
Project assets onto imagery
Select the top Layers icon. From the dropdown, select the asset data you want to overlay on the imagery. You can select Layers in the same way as the main map. See Selecting Layers.
With Yotta Asset Video Survey data, spatial data can be projected into the display imagery. In the example below, a Keep Left sign from the Sign Layer is shown by the green point. Hovering over that point will display its chainage.
Measure assets
Select the top Measurement icon to start measuring. Select the location in the image where the measurement should begin and then drag the measuring bar to where the measurement should end.
With GPS Asset video, you can measure within the image either on a horizontal or vertical plane. Measurements are accurate to approximately 10cm within a 20m radius of the camera vehicle. The Measurement tool remains green if confidence in the measurement is high. However, the colour progressively changes to red as confidence in the measurement falls. When performing distant measurements, the accuracy of the measurement is typically reduced.
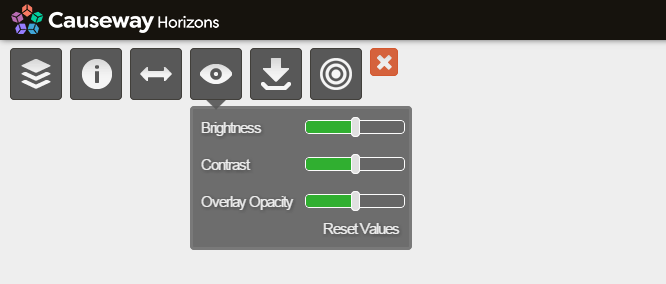
Image adjustments
Select the top Image Adjustments icon. Use the slider bars to make the following adjustments to the displayed imagery:
-
Brightness - make the imagery darker or lighter.
-
Contrast - decrease or increase the difference between the darkest and lightest parts of the imagery.
-
Overlay Opacity - when data items are overlaid on the screen, make them more or less transparent.
It may take a few moments for the imagery to update after being processed.
Download image
Select the top Download Image icon. Your web browser will shortly begin downloading the file. The filename consists of the Section label, chainage location and camera number.
Snap camera
To jump to the best view of a selected data item, turn on the Snap Camera to Item icon at the top.
Close
To close the Imagery View and return to Explorer, select Close at the top.