Works Layers
Define completed or planned works
A Works Layer defines any works that have been performed - or are about to be - that CausewayOne Asset Strategy doesn't know about! It updates the condition of your assets in the absence of newer survey data. This requires you to import a CSV file containing data related to the works, including date, start/end chainages and XSP code.

By incorporating a Works Layer into a Treatment Set, the data can identify Sections that have been - or will be - worked on and perform extra steps during analysis. For each affected Section, it will:
-
calculate the deterioration of the Section's Condition Parameters more accurately
-
ignore triggered Treatments tagged as Major to avoid conflicts with planned works in any year
-
ignore triggered Treatments tagged as Minor to avoid conflicts with planned works in the current year only
When creating or editing a Treatment Set, you can specify a Works Layer in the 1 Details section.
If a Treatment Set has XSP Merging enabled, major/minor Treatments will be ignored even if the works occur in a separate XSP code.
Import the data
Before you can create a Works Layer, you must import its data:
-
In the Management module, select Data Import in the toolbar and then Import Data.
-
Enter a descriptive name for the new data source. Choose the Network it contains data for and select OK.
-
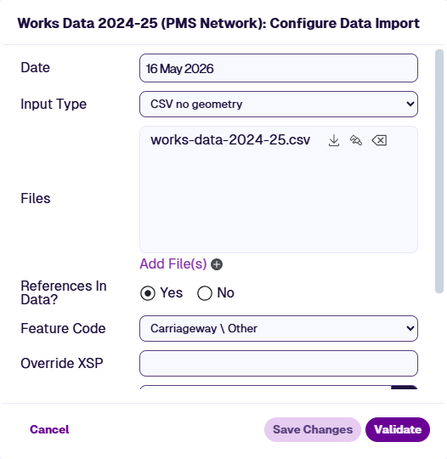
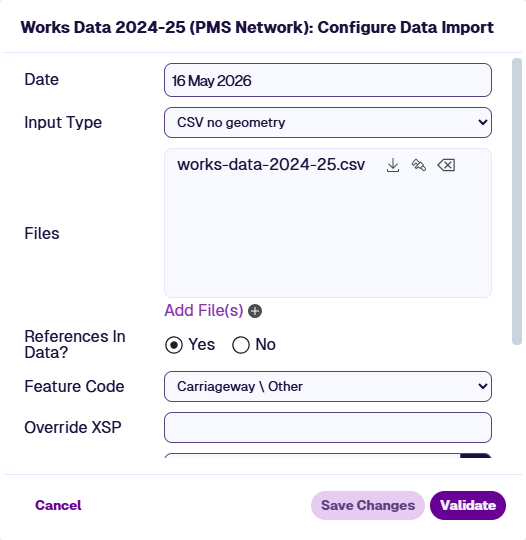
In the Configure Data Import window, fill in these fields:
-
Date - defaults to today's date. Change this to another date as needed, e.g. works completion date.
-
Input Type - choose CSV no geometry.
-
Feature Code - choose the type of asset that your planned/completed works apply to. If not specified, it will default to Carriageway (CW).
-
-
Select Add File(s). Select one or more CSV files containing the planned/completed works data. When the upload finishes, select Close.
-
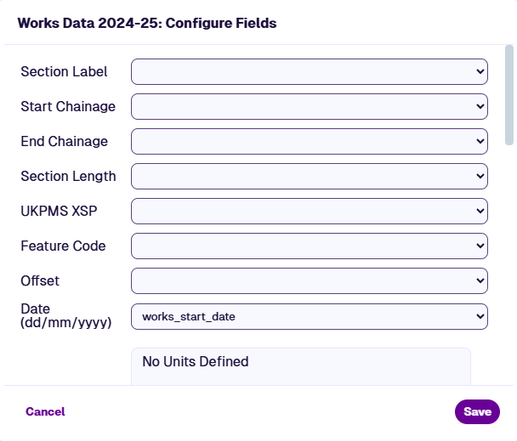
In the Configure Fields window, map the Date field to the relevant column in your uploaded file. This is essential for deterioration to be calculated correctly during Analysis! If not specified, every Treatment date will default to the Date specified in step 3.
Map the remaining fields to the relevant columns in your file as required. Select Save to finish. See Configure fields.
-
Fill in the remaining settings according to your requirements. See Configure data import.
-
Commit the import. See Validate and process.

Create a Works Layer
Once your data is imported, create a Layer that uses the data source:
-
In the Explorer toolbar, select Layers and then Add Layer.
-
Enter a descriptive name for the new Layer. Choose the Layer Group folder it will belong to and select OK.
-
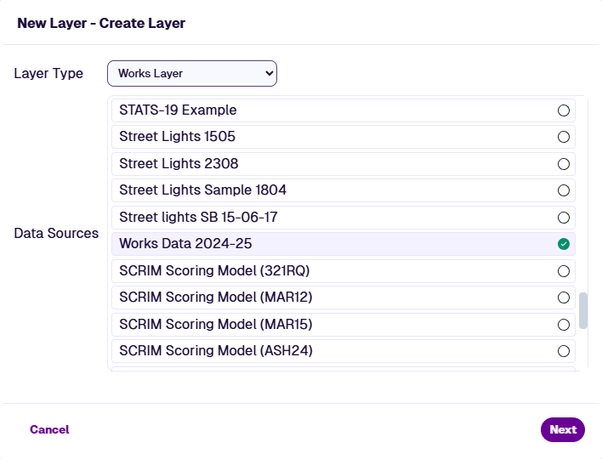
In the Create Layer window, select the Layer Type dropdown and choose Works Done Layer. Choose your imported data source and select Next.
-
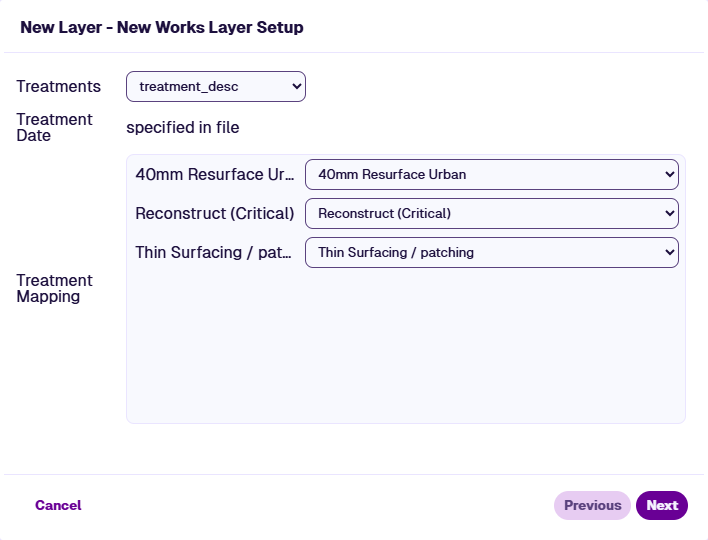
In the next window, select the Treatments dropdown and choose the field in your imported data source containing Treatment names or codes.
All values for the chosen field will appear in the Treatment Mapping box. For each one, choose the corresponding Treatment that is defined in CausewayOne Asset Strategy. Select Next.

-
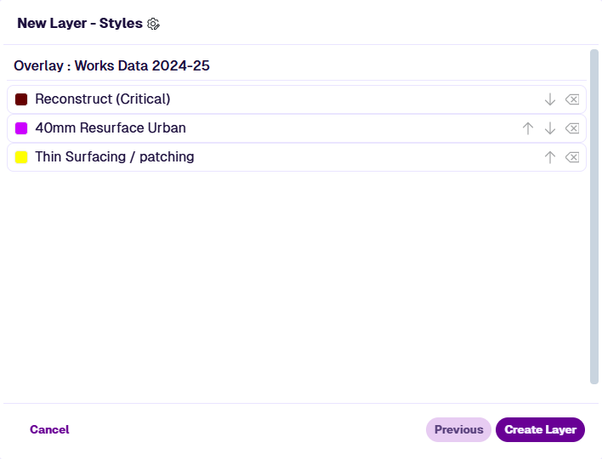
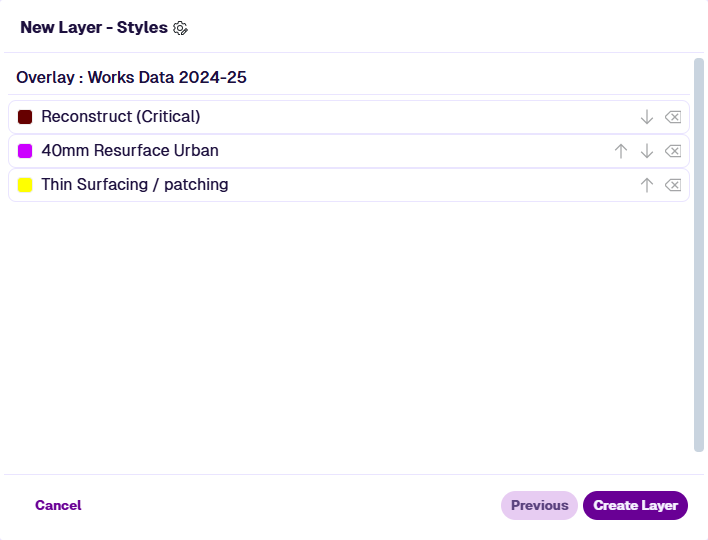
A Layer Style is created for every Treatment in your imported data source. Select one to customise its appearance. Select Create Layer.

Use a Works Layer
When creating or editing a Treatment Set, you can specify a Works Layer in the 1 Details section. This can significantly improve deterioration calculation and avoid Treatments that could clash with the planned/completed works.
To visualise a Works Layer on the map, select Layers in the Explorer toolbar and select it in the dropdown. See Layers.